Cloud Deployments - OpenVPN Installation, Configuration & Connecting
For all cloud deployments, all remote access is via OpenVPN and an appropriate client will need to be deployed and configured, the project engineer will be able to assist you.
Prerequisites
You will need the following information before you can set up the Open VPN tunnel. NOTE. The accounts are unique and can not be used more than once:
- OpenVPN configuration file (eg your-company.ovpn)
- Username
- Password
and you will be required to have an up to date version of Google Chrome to utilise the full functionality of the INVADE Solution Web Portal.
Installing OpenVPN on Microsoft Windows OS.
OPEN VPN for macOS
For macOS we recommend Tunnelblick free software for OpenVPN https://tunnelblick.net/downloads.html
The main difference being the security on the macOS, you can't install software without entering you admin password and when downloading the key, move it from the download directory to your home directory before adding the Client profile to Tunnelblick. The icon for Tunnelblick is like the entrance to a tunnel and not a monitor screen with a padlock attached.
So the only real change is how it looks rather than function.
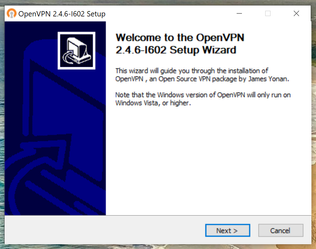
This guide will take you through installing OpenVPN 2.4-I602 onto a typical Microsoft Windows 10 Operating System based computer (other Operating Systems supported), installing the configuration file and connecting to the VPN.
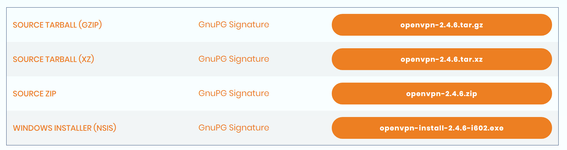
- Download the OpenVPN software from https://openvpn.net/community-downloads/ - please select "Windows Installer (NSIS)".
- Double click the installer file downloaded above, to start the installation.
- Click "Next" on the first screen.
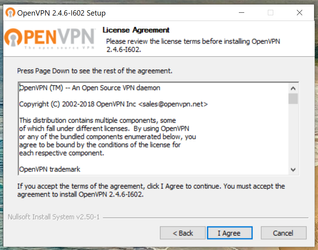
- Review the license agreement, and click "I Agree".
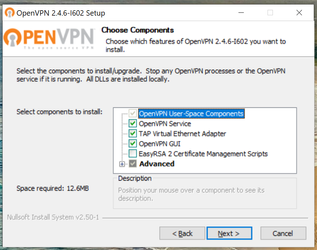
- The next screen asks you to select which components to install, we recommend the defaults so just click "Next".
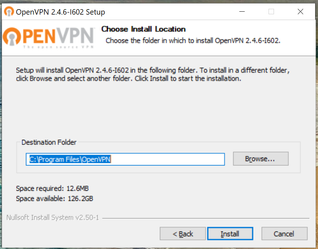
- Finally, review the location that OpenVPN will install use on your PC and once happy to proceed to click "Install".
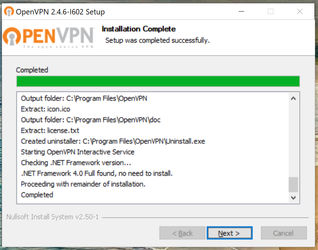
- The installation will now take place and should take less than a minute to complete. Once it has, click the "Next" button.
- Untick the "Show readme" checkbox, and finally click "Finish".
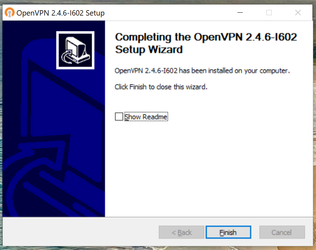
- OpenVPN has now been installed to your computer.
Configuring OpenVPN
Now you have installed OpenVPN we need to configure it, you will need the OpenVPN configuration file, your username and password.
- Double click the "OpenVPN GUI" icon on your desktop, or on your start menu.

- OpenVPN will now be running in the background and can be seen on the Windows taskbar (generally bottom right) of your screen.

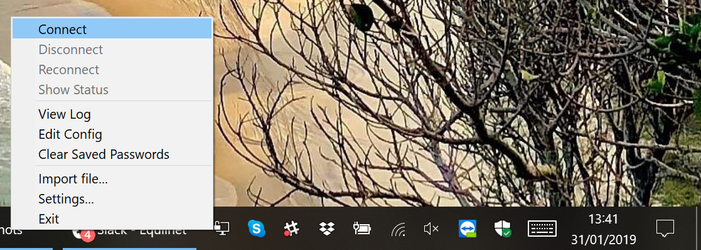
- Right click on the OpenVPN icon and select "Import file..."

- Locate the OpenVPN configuration file provided to you by your Supervisor / Manager, select it in the file explorer window, and click "Open".
- OpenVPN has now been configured.
Connecting OpenVPN
- Check if OpenVPN is already running on the Windows taskbar.
- If it isn't running double click the "OpenVPN GUI" icon on your desktop, or on your start menu to start OpenVPN.
- Right click on the OpenVPN icon on the Windows taskbar, and select "Connect".
- In the popup box enter the provided VPN username and password, then click "OK".
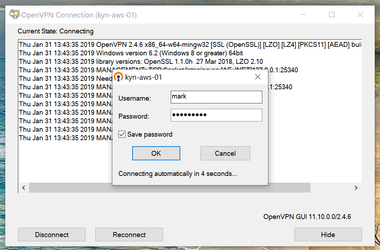
- The VPN will then connect (this can take up to 10 seconds) and the popup box will disappear once connected.
- You can verify you are connected to the VPN by checking the OpenVPN icon on the Windows taskbar is green.

- You are now connected to the VPN and can access the dialler web portal in your Google Chrome web browser, with the details provided by your Supervisor / Manager.